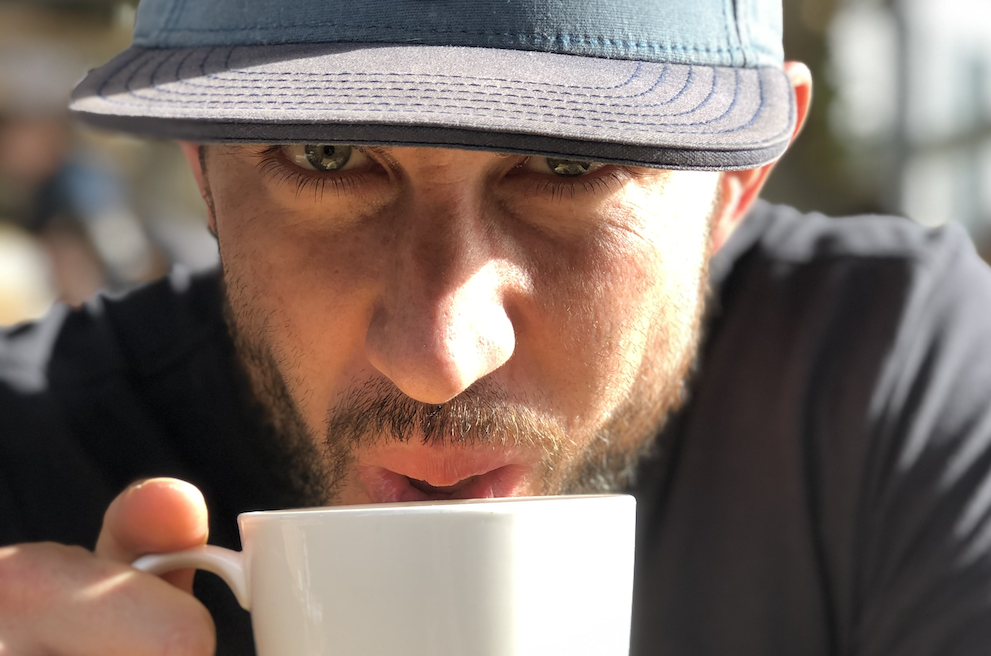
Live Loud Life Podcast EP|1 Intro
Live LOUD Life Podcast
Episode 1
Welcome and Introduction From your Host!
Guest & Host: Dr. Antonio Gurule DC
This is our first episode with the Life Loud Life Podcast.
I wanted to come on a simply introduce myself as your host and share a little about what we are planning the show to be and what you can expect in the future!
I am stoke to be on this journey with each and every one of you.
I am excited to share what we utilize in our families everyday lives to help with our help and longevity, as well as some of our fitness habits we use as busy parents and business owner!
Enjoy!!
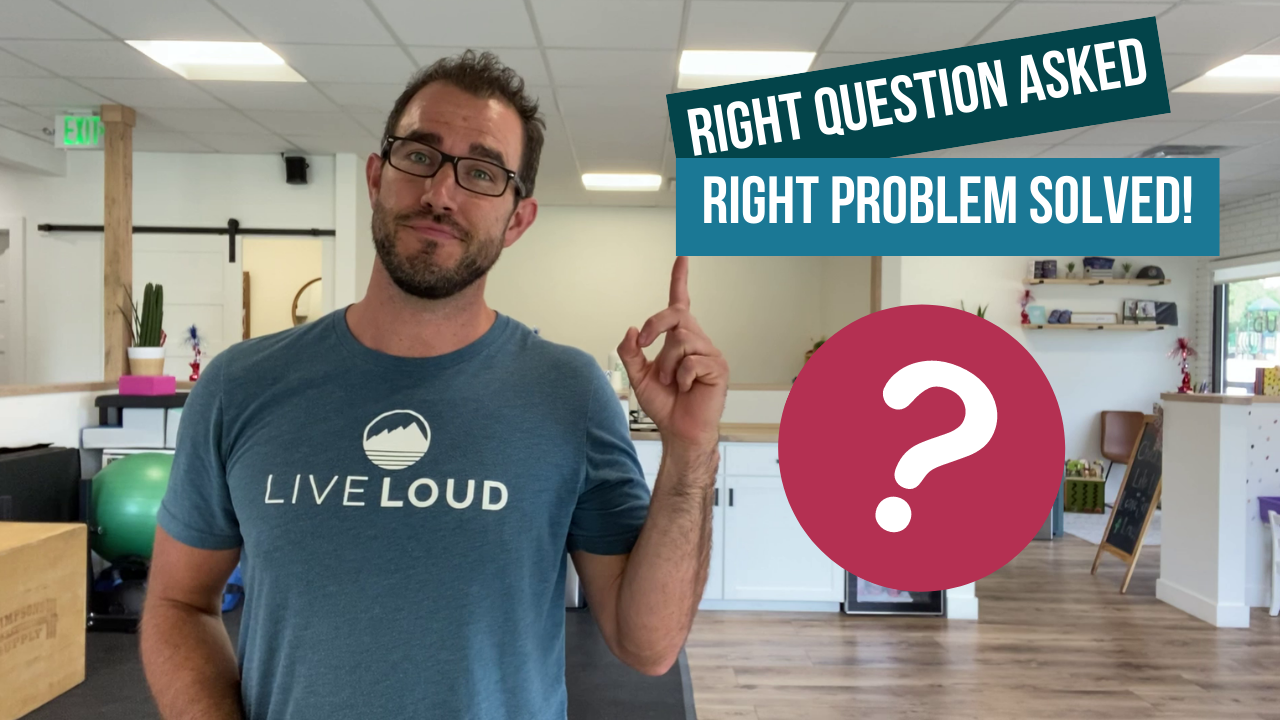
About Dr. Antonio
Background:
-
Personal Trainer
-
Chiropractor
-
Founder of Live LOUD
Check Out Some of Our Other Blog Posts and Podcast Episodes

A Better Way To Stretch Your Tight Hips
A Better Way To Stretch Your Tight Hips
We sit too much.
Our exercise programs are repetitive and boring.
We lack variety and complexity.
The hip is a big ball and socket joint and it needs load, it needs variability, it needs movement.
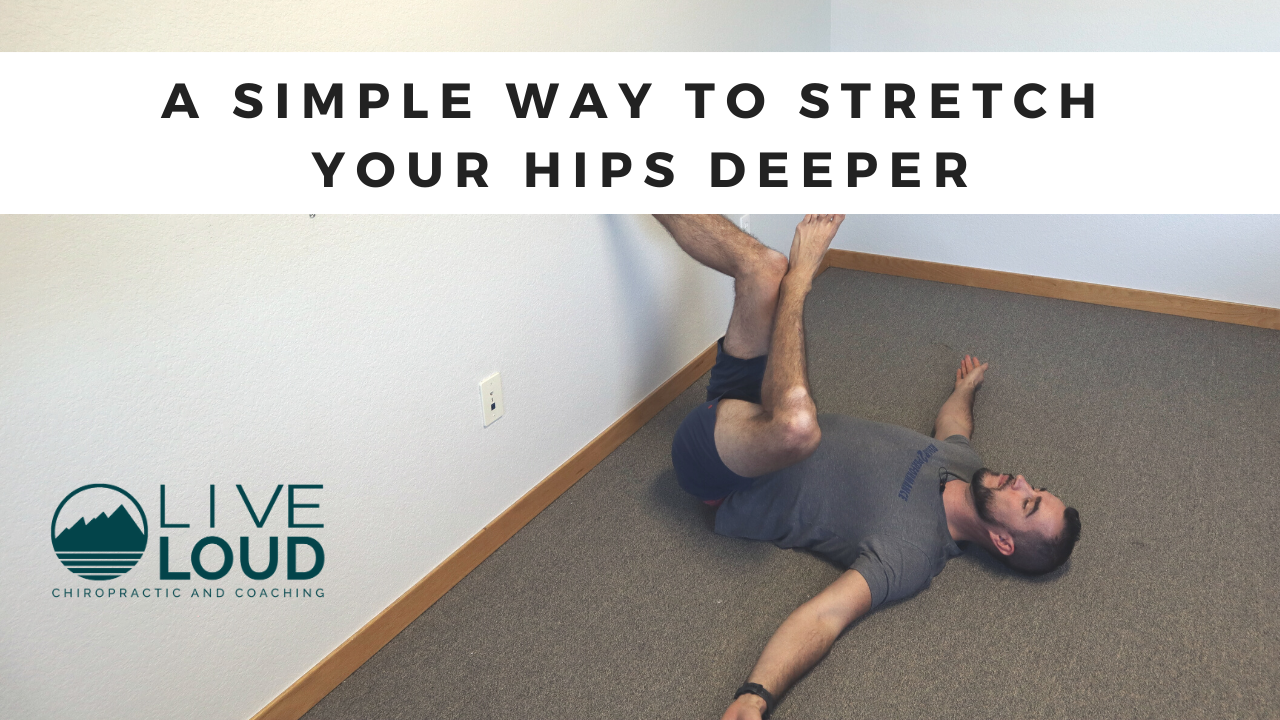
Hi, my name is Dr. Antonio with Llive Loud Chiropractic and Coaching here in Lafayette, Colorado. And today, we’re going to show you just a spin-off of the basic figure for a hip stretch or pigeon stretch.
But with this particular movement, we’re showing how to make it just a little bit easier, especially if you have really tight hips, and you use the leverage of the wall to help you. This prevents you from having to crank or pull on your leg or your knee, potentially making it a little bit more uncomfortable.
PLAY VIDEO ⬇︎
How to Stretch Your Hips Better
- You are going to start by having both my legs up against the wall, the leg that I am choosing to stretch on, I’m going to bend and I’m going to put it across the other leg
- I’m going to start to slide the other foot down the wall.
- You should feel a nice deep stretch in the glutes/butt Now what’s great here too, is now my foot driving, not driving, but pretty much posting up against the wall, I can just rest here.
- Relax and breathe, and sit deeper and deeper into that stretch.
Again, if you push too hard, you’re only going to tense up and make it worse. As that starts to release a little bit more you can slide the foot down deepens the stretch. And you can also play around with very gently leaning into your knee or changing that kind of torque and leverage position to hit different parts of that glute complex or fibers around the hip. Again, we’re looking for holding for anywhere upwards 30 seconds to two minutes depending on how tight you are. And depending on again what you can tolerate as always sliding over.
What Should You Do After You Stretch?
It is important that after you go through any sort of stretching exercise or program, move afterward, don’t go back and sit down, utilize what you just created by maybe doing some squats, maybe doing some hip hinges, maybe going for a walk or maybe even doing some lunges, but you have to move and you have to show your body what that new range of motion can and should be able to do.
Keep up the great work and Live LOUD!
Share below with a friend or loved one!
Fix Your Feet & Improve Mobility With Tall Kneeling Sit
Fix Your Feet & Improve Mobility With Tall Kneeling Sit
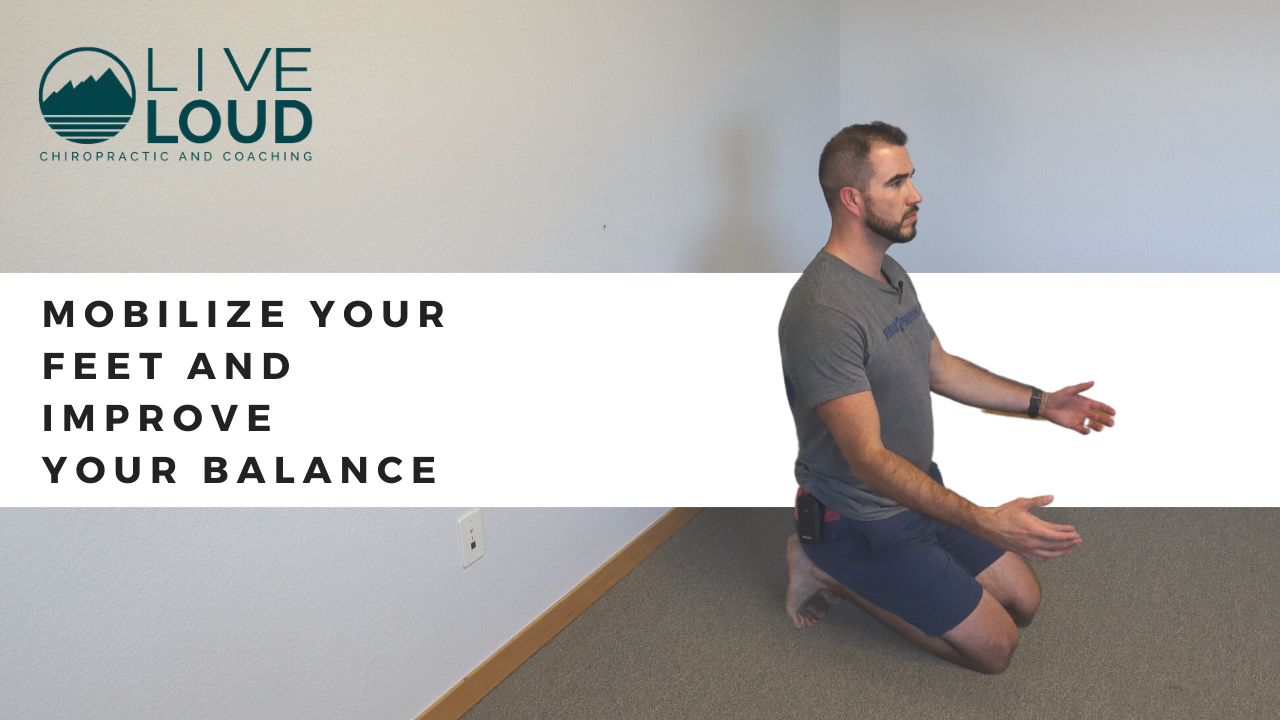
Did you know that it’s estimated that 60% of your propulsion forces off of your foot are coming through your great toe? As we walk and we run we actually need to pronate towards that terminal push-off phase and we should be rolling off of that big toe.
Many people are lacking big toe or great toe extension, thus leading to a super-stiff joint which could cause issues such as plantar fasciitis, up the chain, knee pain, and comm sometimes commonly even low back and or hip pain.
Now, something to consider is why this happens in the first place. Our sedentary lifestyle of sitting for too long, not moving our feet, and one of the big ones is keeping your feet into very tight restrictive shoes that prevent the toe from moving at all.
PLAY VIDEO ⬇︎
Free the Feet!
So we do encourage barefoot walking and a good amount of barefoot training depending on what your environment is and what your lifestyle on how much that allows.
So the exercise, you’re going to be on your knees, if you need a little bit of pat on your knees, go ahead and do so notice how my tops and my feet are on the ground, I’m actually going to flip that so that my toes are on the ground. And from here, I’m simply going to try to sit back my butt to my heels.
I want to see if you can sit here for 10 seconds.
And then we’re going to come up and we’re going to work up to a 20-sec tolerable sit.
Tolerable means, you can be in the position with mild discomfort or irritation while being able to breathe and maintain the positioning
What To Do If You Have Joint Pain or Irritation
Now, if you have any sort of Orthopedic joint restrictions, joint replacements or like that that can make this compromising. As always, reach out to your medical provider, your Chiropractor, your PT or coach to see if this is right for you.
Something that can help though is if you have a door, or maybe some a suspension trainer or something like a beat a bandage or some that you can hold on to that can help take some of that load off so that you can work into this exercise a little bit more gradually, rather than just dropping all of your weight. Okay, if you do have some knee restrictions, you can sometimes put a pillow or a pad behind your knees and that can take some of that pressure off. But again, we’re looking for working up to 20 seconds of a tolerable said not that any movement especially if you are tight is going to be completely pain free. But that tolerable movement will get better and better the more you do it, we do not want to be creating pain. So take note of that. But this is a fantastic exercise to work on your foot range of motion, which improves your balance which improves your proprioception which will oftentimes have huge carryover to athletic performance or whatever activity you enjoy.
Keep up the great work and Live LOUD!
Share below with a friend or loved one!
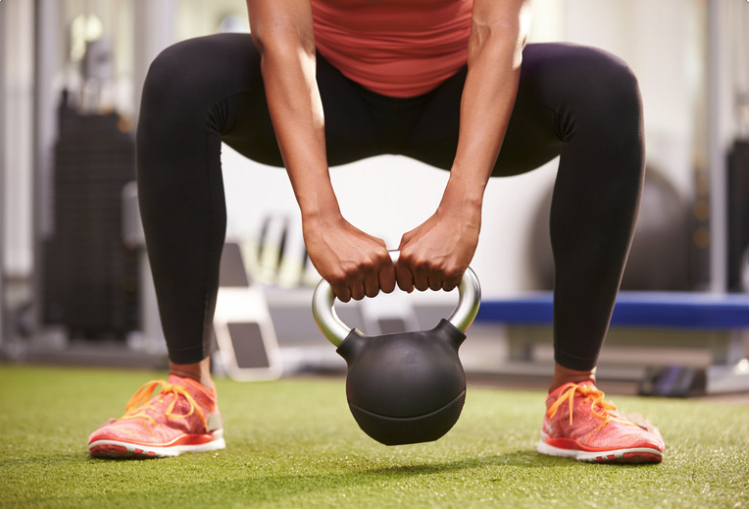
Why Everyone Needs To Be Doing Goblet Squats
Why Everyone Needs To Be Doing Goblet Squats
Are you unsure about what squat technique is right for you? Many of you know, squats are really beneficial, but maybe they hurt your hips, your knees or your back. Even though squatting is a fantastic exercise it can be a challenging movement. So I’m going to give you my favorite squat exercise, and why I think everyone should be doing the goblet squat.
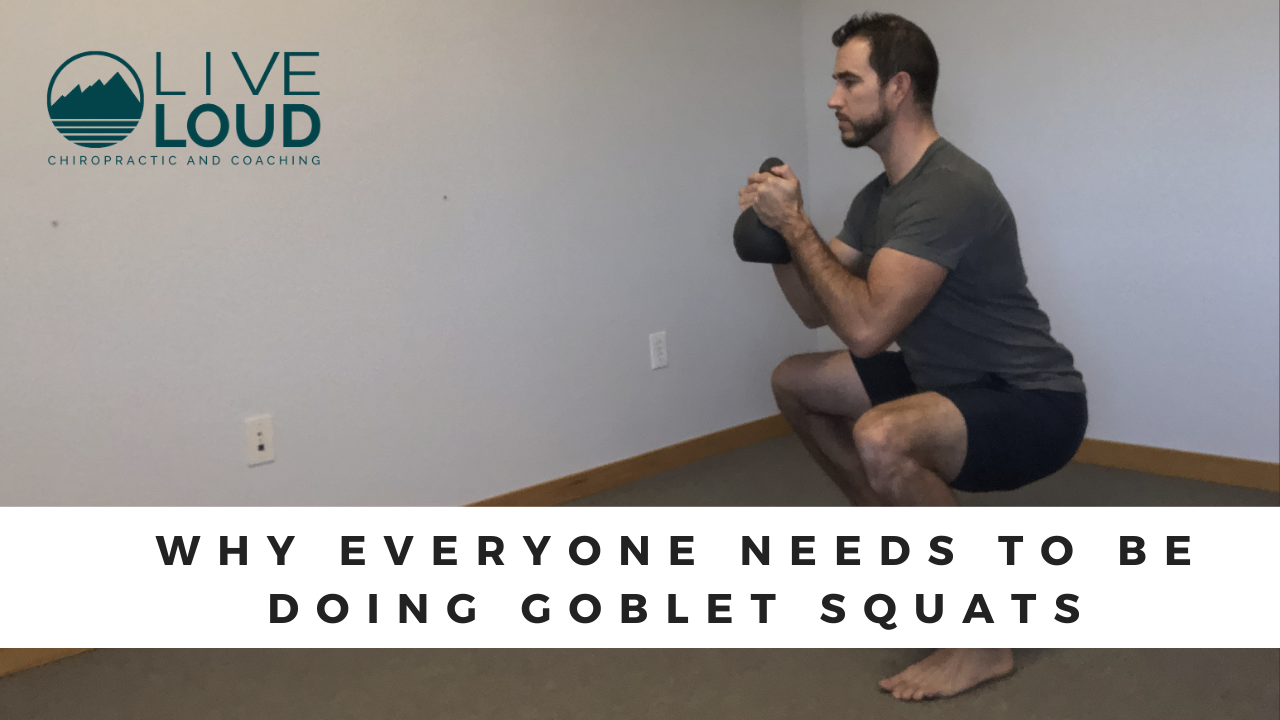
My name is Dr. Antonio with live loud Chiropractic and coaching here in Lafayette, Colorado. And today, we’re reviewing my favorite movement, the goblet squat.
This one movement covers a lot of ground for me, allowing me to hit many different areas of my body.
PLAY VIDEO ⬇︎
What is the Goblet Squat
The goblet squat is simply just you holding a weight out in front of your chest, and going through the squat motion. I do not care about depth. But if the depth is one of the things that makes you unbalanced, or maybe it’s more challenging for your knees, your low back, that’s something we want to check but that is not the intention right now.
What is really beneficial about the goblet squat is when I hold the weight out in front of me, I have shifted my center of mass slightly forward. So that really forces my abdominal wall and my back, which we do want to strengthen our back to help for longevity and reducing chances of injury. It really helps target those areas by just holding the weight.
And it’s much different than any other form of squatting like front squats or back squats.
Now one point that I will give is, you need to understand what squat stance is right for you. If you don’t know, feel free to go to our YouTube channel, we have an extensive video that talks about squat stance. But if you’re not sure, it is very helpful to understand what squat stance is right for you. Find a width and a toe angle that works right for you.
Stay Under the kettlebell during the Goblet Squat
- Hold that weight and pull elbows underneath the weight.
- Do not let the weight pull you forward when you go down
- As you go down. I want to make sure I’m staying underneath the weight.
- Arms pivot forward slightly. Right. I want to make sure I stay under that weight so it’s not pulling me forward.
- Forearms stay vertical
- I want you to think about spreading your hips apart so that your torso can hopefully sit in between.
Okay, you can structure this into your workout a lot of different ways. But the goblet squat, I feel is one of the things that everyone should be doing and helps you mobilize your joints and helps you get stronger a number of different areas added in, ask questions, reach out to your trainer, your coach and see if this might be a good or the right exercise for you.
Keep up the great work and Live LOUD!
Share below with a friend or loved one!
More Tension More Strength
More Tension More Strength
I know you guys are working hard and it’s awesome to see and you’re lifting weights and you’re training and you’re trying to build muscle. Here’s one tip I want to give you when you are lifting that’s going to help you maximize and expand the effort that you’re already putting into your training.
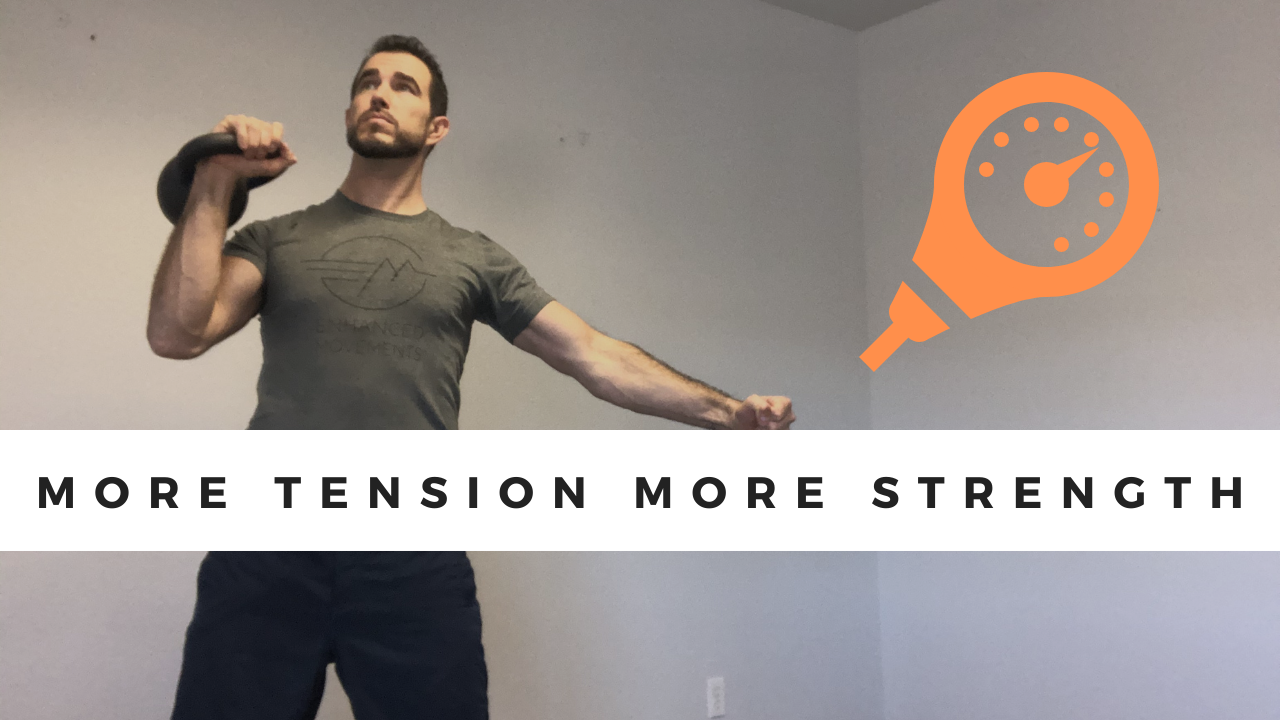
Hi, my name is Dr. Antonio with Live Loud Chiropractic and Coaching here in Lafayette, Colorado. Today, we’re going to be talking about tension.
PLAY VIDEO ⬇︎
How To Feel Tension
Now, this comes from early training, research, and development. It’s a term called irradiation. So what I want you to do right before we get started is I want you to feel what irradiation is. And most of us have probably experienced this to some capacity. But what I want you to do is I want you to make two fists here with your hands. And I want you to just squeeze your fist as hard as you can.
Okay, now squeezing your fist as hard as you can, you probably feel a good amount of tension in your forearms and your hands. Right?
Good. Shake it out.
Next, what you’re going to do is you’re going to do the exact same thing, the only movement that you’re doing is squeezing your fist. But I want you to start to realize what’s happening here, and maybe even in your back as well.
Ready 3.2.1… squeeze.
Ah, did you feel that?
I felt my abs turn on my lats and a little bit of my back as well.
Good. Shake it out, shake it out.
Next, what I want you to do is we’re going to do the exact same thing. But what I want you to focus on now is what happens to your legs and maybe even your butt muscles.
3.2.1.. Squeeze! There it is, you might even be holding your breath a little bit, which is okay, that is the power of irradiation by actually squeezing and creating more tension you can leverage to actually move more weight.
Putting The Pieces Together To Get Stronger
So let’s say I have my weight here in the front rack position like I am going to press it, what you’re going to do right before you lift is you’re going to create this pulse of tension.
So the hand that’s holding the weight, kettlebell dumbbell, whatever it is, the opposite hand is going to be off to the side a little bit, but you’re going to squeeze both. And in doing so you should feel tension generated in not only your shoulders but hopefully your abs a little bit in your back. And then you should feel hopefully your butt squeeze a little bit.
So this is going to create a solid platform that your shoulder can then push off of many times. You not getting the full expression of our strength, because as we’re pushing, we’re wobbling platform.
You are creating more tension to move the weight. So let’s just pump it up a little bit so that you can move more weight, expand upon the strength that you’re already presenting with and then hopefully help you get a little bit stronger along the way.
Keep up the great work and Live LOUD!
Share below with a friend or loved one!
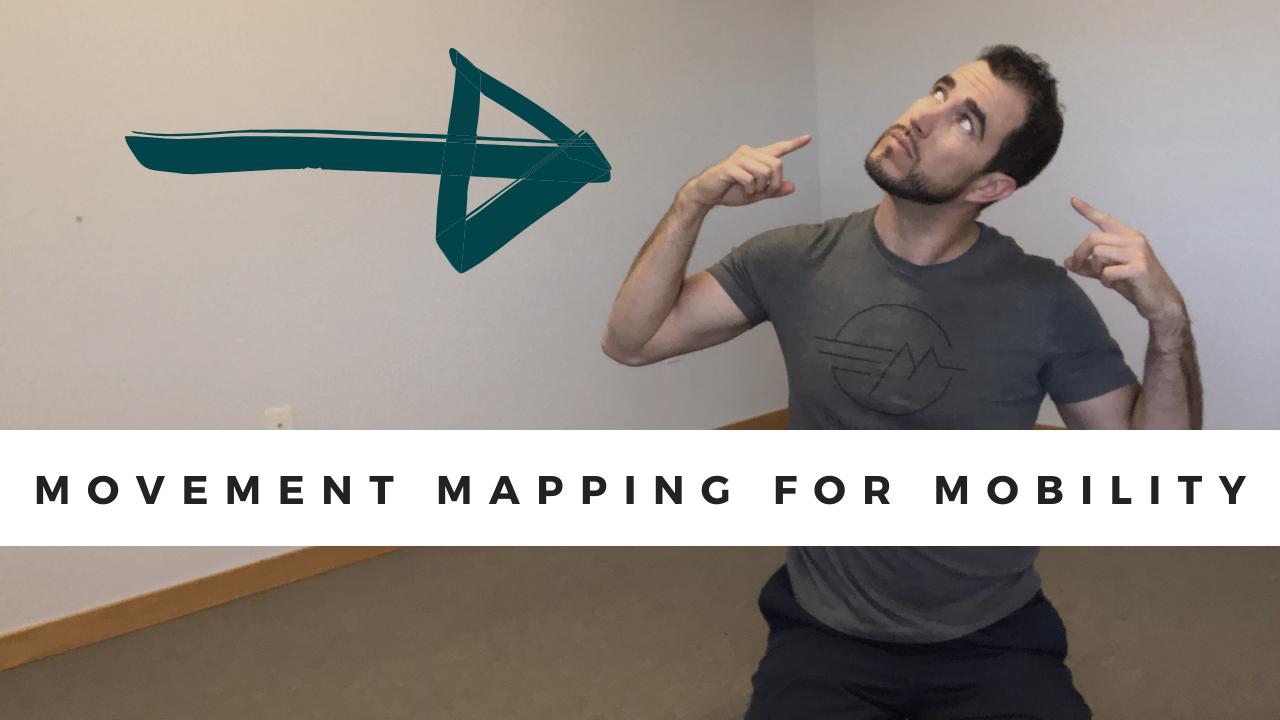
Movement mapping To Improve Your Range of Motion and Pain
Movement mapping To Improve Your Range of Motion and Pain
Hey, if you’re anything like me, you find that sometimes it’s tough to know which exercises are best to do, even as someone in my industry and in my profession, I’m always trying to find what the best exercise is based on how I feel. Now, most people struggle to understand this because they don’t know where to start. So I want to help you with that today.
My name is Dr. Antonio Gurule. I’m a chiropractor here in Lafayette, Colorado, with Live Loud Chiropractic and Coaching.
Today, what we’re going to be talking about is called movement mapping. Before you even do an exercise or a stretch, you need to know if it is actually a good fit for you.
Especially when we’re talking about mobilizations, how do you know where you need to mobilize other than just where you feel tight, right.
We need to be able to move every joint in our body every single day, and movement mapping is a way for you to audit your joint range of motion and abilities. And if you don’t, it starts to get really stiff, just like a rusty hinge on a door. And then it makes it more challenging to move at all.
PLAY VIDEO ⬇︎
All of a sudden you see a series of events happen where if my joints don’t move, well, then my muscles get really tight. And then if my muscles are tight, it’s hard to move my joints. And then we just see how this sticky material just starts building up on top of each other.
Realistically, anything movement you do is going to be good. But could we be a little bit more direct with what we’re doing?
How To Audit and Assess Your Range of Motion
Movement mapping is a global head-to-toe audit of what things feel like now.
Certain body parts such as the wrist and shoulder are straightforward and easy but your spine and your neck are two of the areas that are really forgotten and overlooked.
When movement mapping the neck be sure to sit down and do it in case you get a little dizzy or lightheaded.
The neck, if you consider all of the ranges of motion that should go through, we have flexion, we have an extension, we have side to side lateral flexion, and then we have rotation. Now there are baseline ranges of motion that we would ideally like to see, but what we forget is that our head doesn’t move like a robot. We couple those movements together so that we can do dynamic movements like checking a blind spot, or seeing something that’s flying over your head.
So movement mapping for your neck is taking into consideration all those planes of motion and trying to determine where you feel stuck. So for instance, I might look up and then add rotation. Right, I might look up and then go side to side. Or I might go side to side, and then add rotation.
I’m putting each one of these joints into a different position so that I can challenge it and make sure it’s moving. Even if one little corner of the joint is not moving, well, that’s going to bleed over and start to make the whole joint tight.
And this happens to so many of us because we live life right here in front of us, we often don’t look up, we look over to the side of a check-in a blind spot maybe. And while we’re driving. We’re looking down a lot. But we’re very rarely going side to side.
What I want to encourage you to do is just start mapping what areas are actually tight. And when you feel that tension, I want you to think of it like a rusty door hinge. instead of forcing it to stretch and move. I just want you to move in it back and forth. Just move it, move it, move it. Fortunately for us, we have our own WD-40, which is called synovial fluid it’s built into our joint, and the more we move it the more vascularization or blood flow we’ll have and then we’ll replenish that and then we’ll make that joint softer and more mobile
Don’t force it. You just brush up against the end of the range of motion and you move and then you come off and you go somewhere else and you move. This just done daily will make profound effects and how you feel, how well your joints move, and how and how loose your muscles can be. And it’s going to be very rejuvenating and revitalizing to the energy that it also brings you. So, if you haven’t done movement mapping, I strongly encourage you to do movement mapping, get a cup of coffee, get a cup of tea, do it in the morning, do it in the afternoon, do it wherever you see fit for your body, and I hope that can continue helping you live the adventurous life you were made for Once again, my name is Dr. Antonio.
Keep up the great work and Live LOUD!
Share below with a friend or loved one!