Fitness
Grease the Groove To Get Strong
Grease the Groove To Get Strong
Hi, my name is Dr. Antonio with Live Loud Chiropractic and Coaching in Lafayette, Colorado.
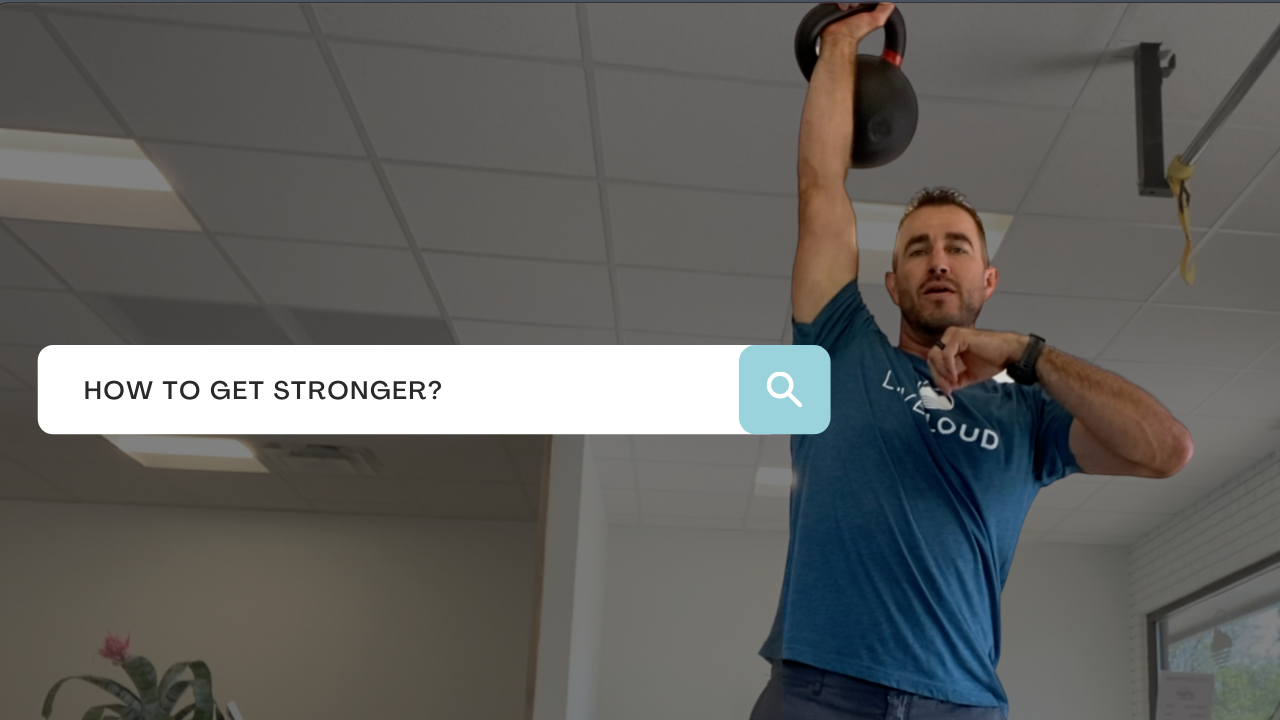
Today, I want to share a concept called Greasing the Groove. Greasing the Groove is a concept first shared by Pavel Tsatsouline with Strong First.
Oftentimes we have patients saying they’re struggling with a movement, or that they just don’t feel strong. It’s challenging because they’re often trying to complete a lot of reps within an hour training session. People tend to fatigue really fast, especially if it’s a movement they’re not very strong in at first. They’re not able to actually get good quality reps. You will find that you are fatiguing faster than you can get stronger, and you’re not able to build and train that strength.
PLAY VIDEO ⬇︎
How To Grease the Groove
As the story is told, Pavel had a pull-up bar hanging from the entryway into the kitchen. And every time he went into the kitchen, he did one pull-up. So throughout the day, with the amount of times he went through the kitchen, he accumulated a lot of reps.
The idea here is to be fully rested and prepared for the next set. So if throughout the day, for example, you do one pull-up every hour, you’re going to accumulate upwards of 16 to 18 reps, with every single rep feeling easy. So let’s say for after a week, you now have X amount of repetitions. As you start to feel stronger, you can continue to build up.
For me, I’ve been wanting to get my pressing strength back up in my pull ups. In my office, I have a pull-up bar and a kettlebell. And in between patients, I’ll do easy reps—reps I know I can complete and that I will not fail. And throughout the day, I get a ton of repetitions. And as I start to feel stronger, I’m going to add repetitions. To start, if I feel like I can only do one quality rep, I’m only doing to do one rep. I’m not trying to grind out extra reps just because I feel like I need to—I’m going to stop before I fail. But that doesn’t necessarily mean using “easy weight”—they’re easy reps, but you’re challenging yourself with a high stimulus type of weight.
As I get better at pull ups, I can’t stay at five reps and assume I’m going to continue to get stronger. I might have less rest in between those breaks, which allows me to get more volume. Or if the volume (how many sets I can do throughout the day) stays the same, then I might need to add repetitions or add weight to my body. There’s a lot of different ways that you can do this, depending on the time and equipment you have.
Conclusion
So there you have it! Greasing the Groove. The neurological patterning around that movement is enhanced and expanded, which helps make you stronger. A lot of this is neuro-driving and neuro-grooving. The muscles get a lot of repetitions and a lot of volume, and that results in building strength and muscle.
Keep up the great work and Live LOUD!
Share below with a friend or loved one!
How To Heal a Bulging Disc
Bulging Disc: How to Heal Low Back Pain Naturally & Make a Comeback
When it comes to understanding bulging disc, herniated disc, and other disc injuries that cause back pain, there are some nuances that’ll make it easier for you to heal naturally and make a comeback.
This is Dr. Antonio with Live Loud Chiropractic & Coaching in Lafayette, Colorado. Today, we’re going to cover exactly what bulging discs and herniated discs are and how they cause back pain. Most importantly, we’re going to cover how you can protect yourself from disc injury and what you can do about it if you’re already in pain from a bulging or herniated disc. If you have back pain or you’ve been told you have a disc injury, this blog will be especially useful for you.
PLAY VIDEO ⬇︎
What Are Discs and Vertebral Bodies?
When we’re talking about bulging or herniated disc, it’s not a black or white issue. So first you need to understand certain functions, how certain body parts move and operate, so you better understand your injury. The best way you can do that is by having a proper one-on-one evaluation, but this blog is going to help you immensely in the meantime.
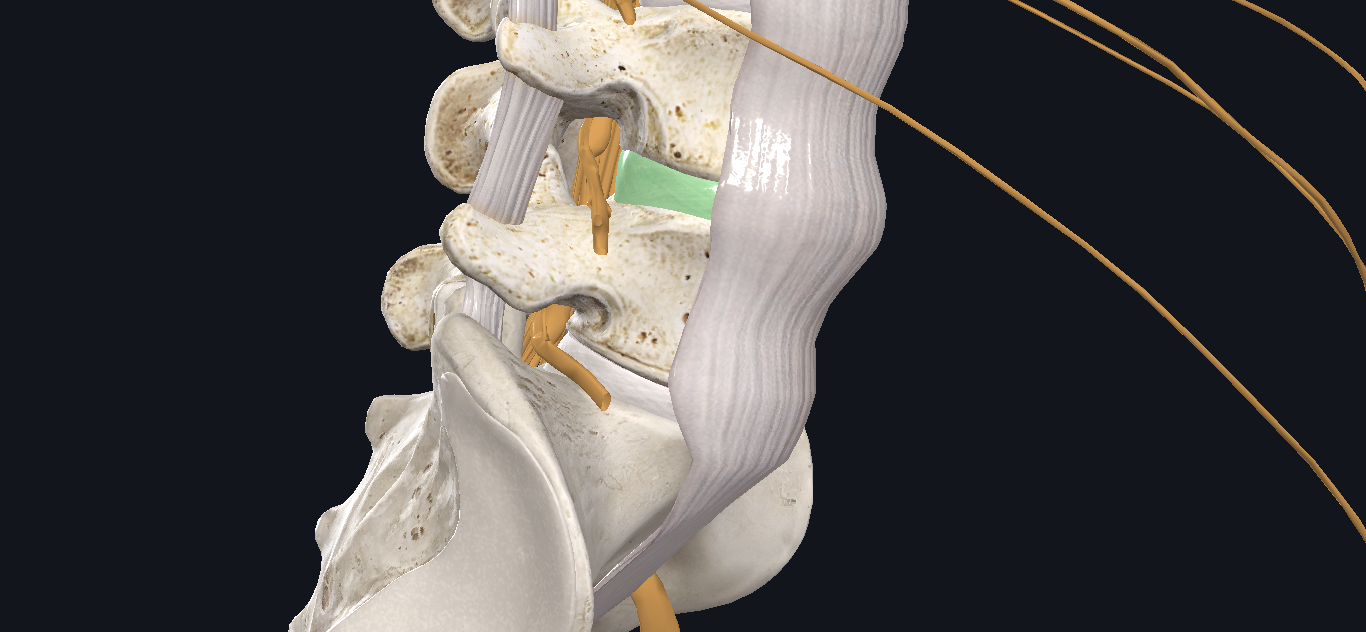
To begin, the disc is what resides in between two vertebral bodies. The vertebral bodies form a column. The spinal cord goes down the middle of that column. It’s protected on the backside by the spinous processes, which is the spine that you can actually feel on your back. And then on the front side are those vertebral bodies. And those vertebral bodies stack up really nice like a column. And that column is what gives structural support to your spine. So when looking at the vertebral bodies, the discs are in the middle of them.
You also have nerve roots that come out from between two vertebral bodies. The nerve roots are what go out to your body, to your trunk, your digestive system, your extremities, so on and so forth to every inch of your body. They direct motor function, carrying signals going out that tell your body to do certain things. They also bring in information to the spinal cord and up to the brain.
You can think of the disc in between as the shock absorbers or the compression component of the spine, as it sits in between those two vertebral bodies. Now, it’s a very strong structure, but it can heal just like any other soft tissue. This foundational information will help you understand how to fix back pain from a disc bulge or herniation.
What Are Intervertebral Discs Made Up Of?
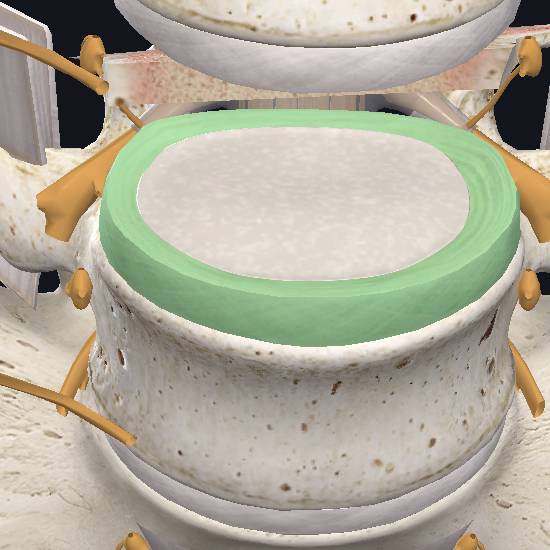
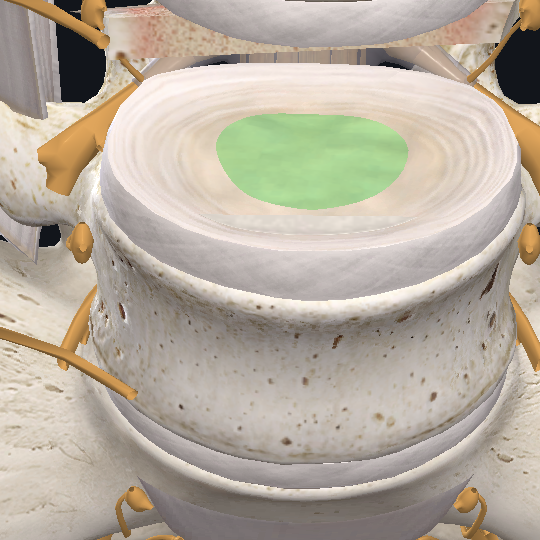
To better understand how a bulging disc happens, it’s important to know how the disc is made up. I want you to think of a tree trunk. If you look at an old tree trunk, you can see the rings, and the rings give you an indication of how old the tree is. But in the case of discs, the rings are called the annulus.
In a disc, looking from the top down, you’re going to have all these layers of rings that go from the inside and get bigger and bigger and bigger as they go around the outside. From the sides, you can imagine those rings lining up. But then the rings will also interchange and be at different angles going across each other.
So it creates this network or matrix of these annular rings that come together and can withstand a lot of great compressions. It also helps deflect twisting and rotational forces known as distraction forces. So any sort of force that goes into the disk is absorbed by this network and fiber of webs that pulls and compresses to make it very strong.
How Do Repetitive Movements Cause Annular Tears?
Now what happens in our day-to-day life is that you tend to do what we call repetitive movements or repetitive behaviors. So, for instance, if you work at a desk, you’re doing a lot of the same positions or movements. If you’re doing any sort of weightlifting or CrossFit or HIIT or even just working out in general, you commonly are doing the exact same motions over and over.
And if a formed technique or another number of factors that can happen begin to build up, then that same repetitive movement pattern wears on those annular rings. And you can get what’s called an annular tear. That’s the beginning of what leads to disc bulges and disc herniations.
Now, depending on the extent of the annular tear, you might not have a true bulge or herniation. You might just have symptoms from the annular tear, depending on where it’s located on the disc. There are three different regions of the disc:
- Middle
- Outer: The outer third of the disc where the actual pain fibers are
- Inner Nucleus: Fluid-filled center
If you have an annular tear without a bulge and you have pain, we do know that that annular tear is probably progressing or migrating towards that outer level.
How Does a Disc Bulge or Herniation Happen?
When talking about how disc bulge or herniation happens, force and pressure are important. Think of the nucleus of the disc as a jelly-filled donut. As you move, that nucleus is going to shift and migrate depending on where the forces are. It’s like a waterbed. If you push on one side of a waterbed, where does the pressure inside the waterbed go? It goes away from you.
That’s really important when we’re looking at disc injuries, herniations, and bulges because we want to know where the force is coming from and where the pressure is going. If you have an annular tear on the outside of the disc, for example, straight compressive forces might be fine.
But we do know from research that the compressive forces within the disc are higher when you’re sitting. And that pressure increases depending on how you’re sitting. As you start to flex forward, for example, the pressure pushes backwards. If you have an annular tear impacted by repeated compression, you’re going to start to see that disk swell into and push through that tear, creating a bulge or bubble on the backside of that disc.

How Does a Disc Bulge Cause a Pinched Nerve?
The bulging disc can actually push back into the spinal column. And depending on how that bulge pushes out, it might be bulging enough to where it puts pressure on a nerve root.
This is where you might get symptoms of sciatica down your leg. You might be feeling numbness or tingling. You might have a little bit of motor weakness or motor loss. Those would all be signs of a true pinched nerve. Oftentimes, when people get nervy pain, they refer to it as a pinched nerve, which may or may not be the case. But this would be an actual pinched nerve.
When your body starts to realize you’re getting this bulge, it’s going to activate the immune system in response to injury. This is going to bring a lot of localized inflammation to help clean up any debris left as a result of the injury, and you’re going to get more localized swelling. That swelling might put additional pressure on that nerve root.
So the pinched nerve might be the byproduct of the swelling in response to the injury, or it could be the disc bulge itself. All are important considerations when dealing with and rehabbing the injury.
Best Movements for Bulging Disc
There are certain movements that help with a bulging disc. To start, it can sometimes be helpful to use a steroid pack to reduce that localized inflammation. This provides you a lot of symptom relief and opens up a window of opportunity for you to do rehab care and movements. This supplements the treatment plan if you’re having a little bit of trouble gaining traction in your recovery.
McKenzie Exercises and Extension Based Movements
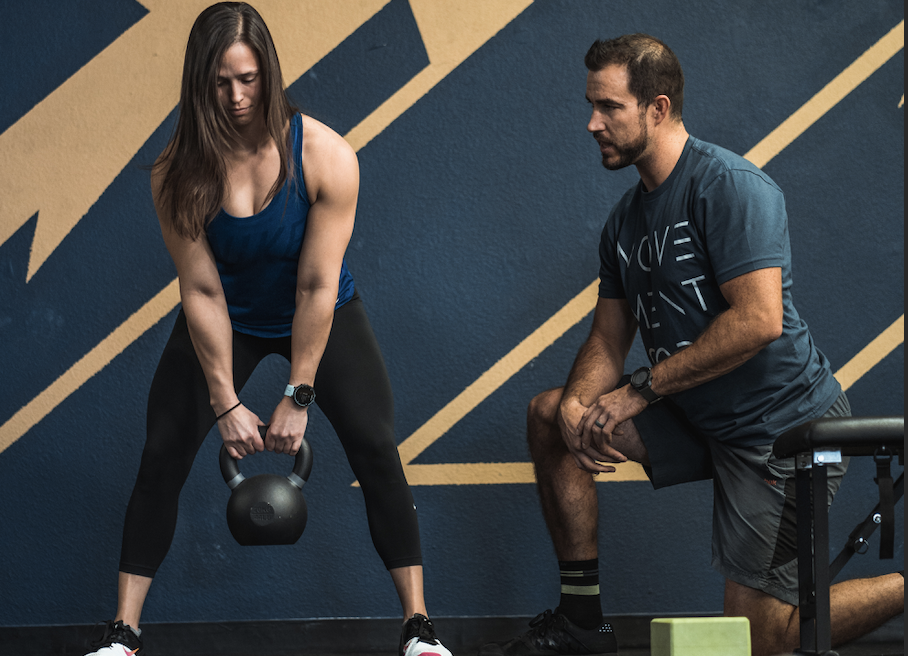
One of the best exercises for bulging disc is called the McKenzie extension. If you have a bulge putting pressure on the front side, for example, will push the bulge backwards. With the McKenzie or Extension based movements, you put pressure on the backside of the disc by going through an extension movement. This will actually put pressure into the back of the disk, helping to reduce that bulge or herniation as it migrates forward. This is why we use a lot of hip drops in our office.
Mindful Movements for Bulging Disc
The other thing you need to consider is how you’re moving throughout the day. Let’s say, for instance, you’re unloading the dishwasher. If you’re not hinging through your hip joint, you might add more flexion in your spine and put more pressure and bulging in that disc.
If you’re being super-mindful about how you’re moving, but then do something a little more careless by flexing your spine forward, it’s like having a cut on your knuckle that you’re trying to heal but then grab something so that scab cracks because it’s right at that flex point. And so it makes it very hard to heal that injury when it keeps moving.
This might be a time when you need to put a splint on your finger to not allow it to move so that scab can heal. The same holds true for this disc bulge or herniation. That annular tear can take a little bit longer to heal due to the nature of the blood flow and nutrient supply that it gets, but given time and careful movement, it can heal like other soft tissue injuries.
What commonly happens, though, when most people go through lower back injuries, disc herniations, and bulges is that they’re not focused on the preventative side other than just rest and don’t do anything. They might do some exercises, but they’re really just hoping it will heal with rest. What most people don’t realize is that the positions or motions they’re doing on a daily basis, activities of daily living such as unloading the dishwasher, picking up a bag of dog food, leaning over to wash your face or brush your teeth, are all opportunities in which you can help the healing process or hurt the healing process by scratching that scab that’s trying to heal.
Hip Hinging for Bulging or Herniated Disc
Properly hinging at the hip instead of flexing the spine is one of the best preventative movements for bulging or herniated discs. Your hip joint is a big ball. It’s a big greasy ball and socket joint. It’s really good at providing movement.
The spine, on the other hand, can move and is really good at flexing, but it depends on the load and the context of the task at hand. When you’re picking up something heavy or bending forward, you need to hinge better through the hip to reduce the load on the disk. This way the spine isn’t flexing and bending all that much. Instead, there’s a pivoting around the ball and socket of the hip, allowing the back to remain straight.
Hip hinging is a prime opportunity for you to keep doing all the things that you need to do, especially if you’re a parent, have a very active lifestyle, or just want to continue the activities you enjoy such as gardening. This movement allows you to stay active without continuing to irritate the disc injury and disc you’re trying to protect.
Prevention Goes a Long Way for Bulging Discs
These preventative measures are one of the most critical factors when trying to get over disc bulges and herniations. The way you develop a condition is commonly how you get out of it. So if you have poor movement mechanics from exercising or lifting at work, for example, then you need to be mindful about those things so that you can let the disc heal while also staying active. You also need to know these mindful preventative movements are what you need to work on going forward so you don’t reinjure the disc.
Again, disc bulges and herniations can and do heal. They often just need a little bit more time and effort. Most don’t know to make the necessary changes to their movement patterns. And they just keep irritating the disc. That’s why healing can get super frustrating. You think…Oh, it’s been a couple months and I’m not seeing any progress or things are getting worse.
If this is you, take a step back. You’re just forgetting that you have to be mindful of those movements patterns. Almost everyone sees some disc bulging or herniation from time to time. It can’t be avoided completely. But when you do get that little bit of pain, it’s an indication that the movements or activities you’re doing are causing too much disc loading and pressure.
Muscle Guarding With Bulging Discs
Now the last thing you’ll want to consider is, oftentimes, a lot of the pain you might be experiencing is the muscle guarding intention that comes as a byproduct.
It is very rare that you will actually strain a big, thick hearty muscle such as the QL. Yes, it’s possible when doing a lot of the movements that trigger or exacerbate lower back pain. But what we often at Live Loud Chiropractic headquarters in Lafayette is that pain is a byproduct in muscle guarding the nerves or the discs.
When you start doing a lot of activities or repetitive movement patterns that constantly irritate those structures, your body is going to say…This does not feel good. I need to lock it up and protect it so that things don’t get worse. And then you get a lot of lower back tension or tightness or spasms or guarding.
Imagine if I asked you to hold your bicep and squeeze it really tight. How would that bicep feel after a couple minutes, hours, days, or even a couple weeks? It’s going to start burning. It’s going to hurt because it’s constantly in the contracted state. When muscles are contracted, they also squeeze arteries and vessels that go through them and supply them with nutrients and oxygen. So the muscle starts to burn even more because it’s in a hypoxic state, and it’s not getting the actual nutrients and oxygen it needs.
The Feed-Forward Mechanism in Naturally Healing Disc Bulging
Now the last thing you’ll want to consider is, oftentimes, a lot of the pain you might be experiencing is the muscle guarding intention that comes as a byproduct.
It is very rare that you will actually strain a big, thick hearty muscle such as the QL. Yes, it’s possible when doing a lot of the movements that trigger or exacerbate lower back pain. But what we often at Live Loud Chiropractic headquarters in Lafayette is that pain is a byproduct in muscle guarding the nerves or the discs.
When you start doing a lot of activities or repetitive movement patterns that constantly irritate those structures, your body is going to say…This does not feel good. I need to lock it up and protect it so that things don’t get worse. And then you get a lot of lower back tension or tightness or spasms or guarding.
It’s important for you to find opportunities that allow the muscles that are guarding and protecting to calm down and relax in order to help the healing process. The more those muscles calm down and relax, the more you’re able to move. And the more you’re able to move, the more blood flow can get in to heal the area.
This will also allow you to realize that certain movements are actually feeling good.This is called a “feed-forward mechanism” or a “snowballing effect.” If you can get rolling in the right direction and gain some momentum, then, commonly, you’re going to keep that momentum going forward in a good way.
The Negative Feedback Loop In Naturally Healing Disc Bulging
The same is also true, though, when you start irritating it. If you’re not being conscious about the movements that irritated it in the first place or that cause more pressure on the disk, then you start having a negative feedback loop. The more pain you feel, the more pain you’re going to experience. And then the more pain you’re in, the more you’re going to become sensitized. Until you get to the point that any little movement or anything out of the norm is going to set you off and trigger more pain.
This is very common for a lot of chronic pain individuals. They just see this bouncing from…I’m good for a little bit, but then I get really bad. And then I feel a little better because I don’t do anything. And then I get really bad. They’re constantly in this flip-flop mode of too hot, too cold, too hot, too cold. In these cases, we really need to dive deep to discover what exact movements and activities irritate it, which it going to be different for everybody.
Making a Comeback after Disc Bulging, Herniation, and Injury
The biggest takeaway is that you need to find opportunities that allow you to move and keep moving. You need to look at the ways you can work on muscle tension and how you can move better. You should look at the ways you’re doing your exercise classes, your training, or working out at the gym. Those repetitive movements are all really important pieces of the puzzle. But there is not a one-size-fits-all approach. It has to be tailored for your body.
We do see a theme, though, with disc herniation and bulges. For many people, it’s that bending forward and flexing forward that tends to trigger them the most. So we have a couple of starting points that work really well.
First, if you have nerve pain or signals or symptoms, don’t just assume you need drugs or surgery. Movements and decompression are also very, very valuable. You just need to know the right exercises to do, and McKenzie extensions and hip hinges are a great place to start.
Next, if you are suffering from disc injury or you’ve been told you have a disc herniation bulge, do not write this off as a death sentence. There are a lot of things you can do. Your disc can heal itself. And even if it doesn’t do that completely, there are additional exercises to continue to strengthen your core and your hips. These can help stabilize and make your back stronger and more robust, which might have been the reason a disc injury happened in the first place.
Finally, if you have experienced disc injury, you know how tough it is. I hope this information helps boost your confidence while recovering from injury as well as preventing re-injury if you tend to have recurrent back pain episodes. And if you know of someone who’s dealing with a disc injury, please share this information with them.
Conclusion
Unfortunately, many of these things are not being taught by medical providers, orthopedics, or physiatrists. Even physical therapists are sweeping some of this under the rug, asserting that these basic movement changes don’t work. But they do. Now you understand how the discs work and can ask the right questions to figure out the right path for you to heal and get on with the adventurous life you are made for.
We’d love to hear your bulging disc or disc herniation questions and experiences. Comment below to tell us what has or hasn’t worked for your disc injuries.
Fixing Sciatic Nerve Pain
Fixing Sciatic Nerve Pain With 3 Easy Exercises
If you’ve ever suffered from sciatica, or pain that maybe runs from your back down into your legs, or you know someone who’s been through this before, you’ve seen how rough it can be, and this blog is going to be very valuable for you.
*Disclaimer this post is for educational purposes, consult with a clinician to determine the best course of care and movements for your pain, or reach out to us for a consult*
Today, we’re going to show you three basic exercises that you can do to help combat sciatic pain. First I will give a brief anatomy lesson about where your sciatic nerve is, and also discuss some of the common misbeliefs that are associated with sciatic pain, and how you can better approach it so that you can actually tackle it once and for all.
Hi, my name is Dr. Antonio with Live Loud Chiropractic and Coaching here in Lafayette, Colorado. Today, we’re going to be talking about relieving sciatic nerve pain!
PLAY VIDEO ⬇︎
Common Question About Sciatic Nerve Pain
- What are the best stretches that I can do?
- What are the best physical therapy exercises I can do for sciatic pain?
- What are the best stretches I can do for sciatic pain?
- Why do I only have pain on one side of my back and down into my hip?
- Why isn’t it the same every day and it changes?
- Why did I just get this sudden onset of pain into my hip?
And a lot of common places we see sciatica pain coming up is not necessarily all the way down the back of the leg as most of us might think. You might just be experiencing it right into your buttock region, or your hip region and a little bit down into your leg. And so there are some nuances there that are going to be very important for you to be able to determine what is the actual cause of the sciatic pain.
We want to be able to help you provide relief, but it’s difficult to ascertain and assess what your actual cause is.
If it is Sciatic Nerve Pain, nerves are very sensitive, and you don’t want this to turn into something more that will create more symptoms, more agitation, numbness, pain, or tingling.
What is the Sciatic Nerve?
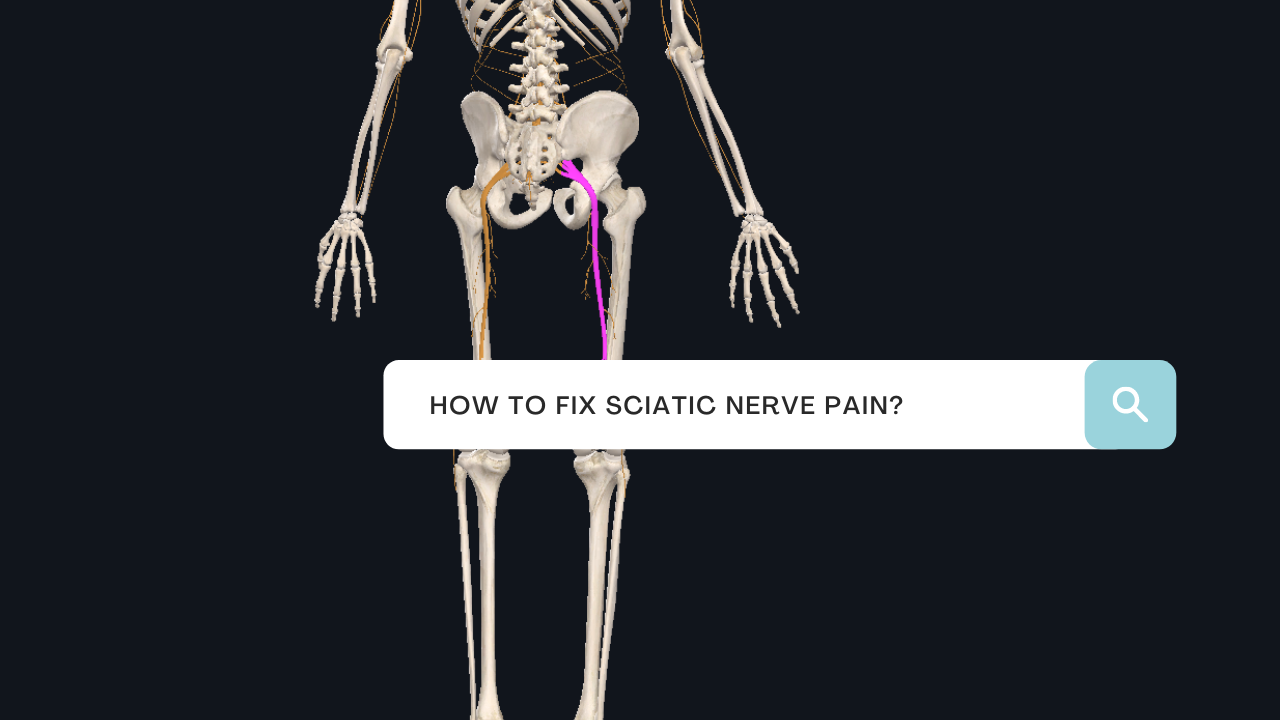
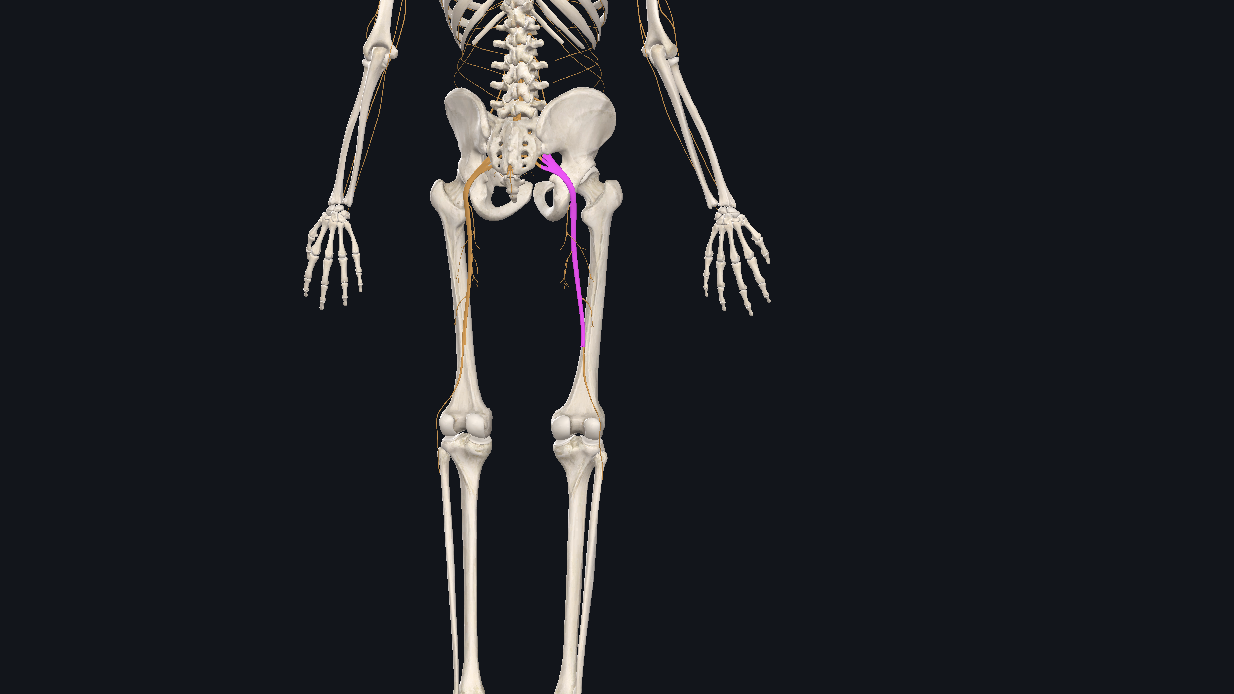
The sciatic nerve is the big, long, thick nerve that runs from the front side of the pelvis where the lumbar nerve roots come, through the pelvis, and then runs down the backside. Now keep in mind, what you don’t see are all the tiny little nerves branching off that supply function and sensory components to the gluteal muscles.
So as we slowly add some of these muscle layers on, we have deeper levels of the glute this is the piriformis which often gets blamed for sciatica symptoms. But we believe it’s not as important as other issues.
Your glutes cover that, so a lot of times the pain in the hip is a sign of a pinched nerve. Likely something in the back is causing a pinched nerve and that’s why you’re getting symptoms that are referred down into the leg. From time to time, you can get sciatic symptoms that are all the way down past the knee and into the foot and into the lower extremity.
But more commonly, we see this happen in the hip. What I want you to take note of are the lower back structures. In between all the lumbar vertebrae, there are discs, and in between the discs, there are the nerve roots coming in and out of the spinal column. These nerve roots then come down together and create the sciatic nerve. This is where a pinched nerve often occurs, a lot more frequently than the classic piriformis syndrome that gets blamed.

Where Does the Pain Come From?
Sciatic pain is a very common diagnosis, and it is even more commonly misdiagnosed, as it is used as a general kind of region open for interpretation. But we want to be more specific with the diagnosis so that you can be very time efficient with your exercises. Usually, as we feel a pinched nerve, we would assume that the side of the pain is where the actual pinched nerve is. However, those tender points that you feel in the glutes and down to the leg might just be a symptom of the pinched nerve that’s up higher.
Many people are just rolling out and stretching and not getting the relief that they need and deserve, because they were improperly instructed. They don’t realize it’s actually coming from their back, but rather, they think it’s coming from their hip, or their piriformis, or their hamstring, or something like that. But if you start to pay attention to when your symptoms in your leg increase, I have a feeling that you’re going to also find that your lower back pain symptoms tension or whatever that might be, might also be increasing, which would be highly indicative that the pain is coming from the back and not necessarily the leg.
We wanted to explain this so you can understand why we’re giving you exercises specific to the lower back. There are methods and strategies that can help alleviate sciatic symptoms, but we’re talking about fixing, we’re not just talking about alleviating. Alleviating is putting a bandaid on it. But what we’re looking to do is actually find where the nerve is pinched, so that you can create solutions you actually need.
I hope you enjoy these exercises, which are going to be super helpful for you.
Best Movements for Sciatic Nerve Pain
1. Door Squats
Our first exercise is for those who are having sciatic pain and hip pain associated with lower back pain. Door squats allow you to offload the lower back into the hips, so that you can continue to move and not overload them where they feel like they’re only getting tighter.
Grab both handles on either side of an open door. Have a wide stance in order to maximize range of motion in the hips without flexing the lower back.
Then lean back like you’re water skiing so your arms take over most of the slack and weight. As you squat, use your legs, hips, and quads, as well as your arms to help guide you. Lean all the way back, using the best form possible, but also use the doorknobs to help keep your spine nice and straight.
2. Quadruped Hip Drops
Quadruped hip drops help alleviate all the tension in the lower back. It also works to help reduce any pain that may be caused by a herniated disc or pinched nerve that causes pain down the legs.
Start on your hands and knees, with your hands slightly in front of your shoulders. From there, shift your body forward, and gently let your hips sag to the ground in an “upward dog” position. Be sure not to force your hips down, but rather, let gravity guide you down as your arms prop you up. Repeat this back-and-forth motion until you feel some release.
3.Hip Hinge Movement
The constant motion of bending over not only puts tension on the sciatic nerve but also puts pressure on the lower back. Our solution is a simple hip hinge movement.
Every time you bend over, likely to pick something up around the house, be sure you’re bending and folding at the hips in order to maintain a straight long spine. This puts the weight into the hamstrings and legs, rather than the lower back. The hips simply go back and forth. Shift the hips, bend at the knees, and avoid loading weight in the lower back.
Conclusion
And there you have it!
Our top three exercises for fixing sciatic nerve pain. These are simple, but they’re so powerful. We hope you will find at least one exercise that works best for you. Take them step by step, inch by inch, But remember, it takes application. You can’t just do one set of 20 and be healed. If we’re assuming there’s an issue causing this, it’s going to take repetition multiple times a day, even once an hour, depending on what the severity is.
Take them step by step, inch by inch, and soon it’ll be a habit. But if it’s not creating a benefit, then we encourage you to seek external help and dive deeper into figuring out what will work for you.
Please share this with someone you know that is suffering from sciatic symptoms, and we hope that it brings you or them as much relief and benefit that it’s brought myself, and our patients here at Live Lab.
Keep up the great work and Live LOUD!
A Better Way To Stretch Your Tight Hips
A Better Way To Stretch Your Tight Hips
We sit too much.
Our exercise programs are repetitive and boring.
We lack variety and complexity.
The hip is a big ball and socket joint and it needs load, it needs variability, it needs movement.
Hi, my name is Dr. Antonio with Llive Loud Chiropractic and Coaching here in Lafayette, Colorado. And today, we’re going to show you just a spin-off of the basic figure for a hip stretch or pigeon stretch.
But with this particular movement, we’re showing how to make it just a little bit easier, especially if you have really tight hips, and you use the leverage of the wall to help you. This prevents you from having to crank or pull on your leg or your knee, potentially making it a little bit more uncomfortable.
PLAY VIDEO ⬇︎
How to Stretch Your Hips Better
- You are going to start by having both my legs up against the wall, the leg that I am choosing to stretch on, I’m going to bend and I’m going to put it across the other leg
- I’m going to start to slide the other foot down the wall.
- You should feel a nice deep stretch in the glutes/butt Now what’s great here too, is now my foot driving, not driving, but pretty much posting up against the wall, I can just rest here.
- Relax and breathe, and sit deeper and deeper into that stretch.
Again, if you push too hard, you’re only going to tense up and make it worse. As that starts to release a little bit more you can slide the foot down deepens the stretch. And you can also play around with very gently leaning into your knee or changing that kind of torque and leverage position to hit different parts of that glute complex or fibers around the hip. Again, we’re looking for holding for anywhere upwards 30 seconds to two minutes depending on how tight you are. And depending on again what you can tolerate as always sliding over.
What Should You Do After You Stretch?
It is important that after you go through any sort of stretching exercise or program, move afterward, don’t go back and sit down, utilize what you just created by maybe doing some squats, maybe doing some hip hinges, maybe going for a walk or maybe even doing some lunges, but you have to move and you have to show your body what that new range of motion can and should be able to do.
Keep up the great work and Live LOUD!
Share below with a friend or loved one!
Fix Your Feet & Improve Mobility With Tall Kneeling Sit
Fix Your Feet & Improve Mobility With Tall Kneeling Sit
Did you know that it’s estimated that 60% of your propulsion forces off of your foot are coming through your great toe? As we walk and we run we actually need to pronate towards that terminal push-off phase and we should be rolling off of that big toe.
Many people are lacking big toe or great toe extension, thus leading to a super-stiff joint which could cause issues such as plantar fasciitis, up the chain, knee pain, and comm sometimes commonly even low back and or hip pain.
Now, something to consider is why this happens in the first place. Our sedentary lifestyle of sitting for too long, not moving our feet, and one of the big ones is keeping your feet into very tight restrictive shoes that prevent the toe from moving at all.
PLAY VIDEO ⬇︎
Free the Feet!
So we do encourage barefoot walking and a good amount of barefoot training depending on what your environment is and what your lifestyle on how much that allows.
So the exercise, you’re going to be on your knees, if you need a little bit of pat on your knees, go ahead and do so notice how my tops and my feet are on the ground, I’m actually going to flip that so that my toes are on the ground. And from here, I’m simply going to try to sit back my butt to my heels.
I want to see if you can sit here for 10 seconds.
And then we’re going to come up and we’re going to work up to a 20-sec tolerable sit.
Tolerable means, you can be in the position with mild discomfort or irritation while being able to breathe and maintain the positioning
What To Do If You Have Joint Pain or Irritation
Now, if you have any sort of Orthopedic joint restrictions, joint replacements or like that that can make this compromising. As always, reach out to your medical provider, your Chiropractor, your PT or coach to see if this is right for you.
Something that can help though is if you have a door, or maybe some a suspension trainer or something like a beat a bandage or some that you can hold on to that can help take some of that load off so that you can work into this exercise a little bit more gradually, rather than just dropping all of your weight. Okay, if you do have some knee restrictions, you can sometimes put a pillow or a pad behind your knees and that can take some of that pressure off. But again, we’re looking for working up to 20 seconds of a tolerable said not that any movement especially if you are tight is going to be completely pain free. But that tolerable movement will get better and better the more you do it, we do not want to be creating pain. So take note of that. But this is a fantastic exercise to work on your foot range of motion, which improves your balance which improves your proprioception which will oftentimes have huge carryover to athletic performance or whatever activity you enjoy.
Keep up the great work and Live LOUD!
Share below with a friend or loved one!
Why Everyone Needs To Be Doing Goblet Squats
Why Everyone Needs To Be Doing Goblet Squats
Are you unsure about what squat technique is right for you? Many of you know, squats are really beneficial, but maybe they hurt your hips, your knees or your back. Even though squatting is a fantastic exercise it can be a challenging movement. So I’m going to give you my favorite squat exercise, and why I think everyone should be doing the goblet squat.
My name is Dr. Antonio with live loud Chiropractic and coaching here in Lafayette, Colorado. And today, we’re reviewing my favorite movement, the goblet squat.
This one movement covers a lot of ground for me, allowing me to hit many different areas of my body.
PLAY VIDEO ⬇︎
What is the Goblet Squat
The goblet squat is simply just you holding a weight out in front of your chest, and going through the squat motion. I do not care about depth. But if the depth is one of the things that makes you unbalanced, or maybe it’s more challenging for your knees, your low back, that’s something we want to check but that is not the intention right now.
What is really beneficial about the goblet squat is when I hold the weight out in front of me, I have shifted my center of mass slightly forward. So that really forces my abdominal wall and my back, which we do want to strengthen our back to help for longevity and reducing chances of injury. It really helps target those areas by just holding the weight.
And it’s much different than any other form of squatting like front squats or back squats.
Now one point that I will give is, you need to understand what squat stance is right for you. If you don’t know, feel free to go to our YouTube channel, we have an extensive video that talks about squat stance. But if you’re not sure, it is very helpful to understand what squat stance is right for you. Find a width and a toe angle that works right for you.
Stay Under the kettlebell during the Goblet Squat
- Hold that weight and pull elbows underneath the weight.
- Do not let the weight pull you forward when you go down
- As you go down. I want to make sure I’m staying underneath the weight.
- Arms pivot forward slightly. Right. I want to make sure I stay under that weight so it’s not pulling me forward.
- Forearms stay vertical
- I want you to think about spreading your hips apart so that your torso can hopefully sit in between.
Okay, you can structure this into your workout a lot of different ways. But the goblet squat, I feel is one of the things that everyone should be doing and helps you mobilize your joints and helps you get stronger a number of different areas added in, ask questions, reach out to your trainer, your coach and see if this might be a good or the right exercise for you.
Keep up the great work and Live LOUD!
Share below with a friend or loved one!
More Tension More Strength
More Tension More Strength
I know you guys are working hard and it’s awesome to see and you’re lifting weights and you’re training and you’re trying to build muscle. Here’s one tip I want to give you when you are lifting that’s going to help you maximize and expand the effort that you’re already putting into your training.
Hi, my name is Dr. Antonio with Live Loud Chiropractic and Coaching here in Lafayette, Colorado. Today, we’re going to be talking about tension.
PLAY VIDEO ⬇︎
How To Feel Tension
Now, this comes from early training, research, and development. It’s a term called irradiation. So what I want you to do right before we get started is I want you to feel what irradiation is. And most of us have probably experienced this to some capacity. But what I want you to do is I want you to make two fists here with your hands. And I want you to just squeeze your fist as hard as you can.
Okay, now squeezing your fist as hard as you can, you probably feel a good amount of tension in your forearms and your hands. Right?
Good. Shake it out.
Next, what you’re going to do is you’re going to do the exact same thing, the only movement that you’re doing is squeezing your fist. But I want you to start to realize what’s happening here, and maybe even in your back as well.
Ready 3.2.1… squeeze.
Ah, did you feel that?
I felt my abs turn on my lats and a little bit of my back as well.
Good. Shake it out, shake it out.
Next, what I want you to do is we’re going to do the exact same thing. But what I want you to focus on now is what happens to your legs and maybe even your butt muscles.
3.2.1.. Squeeze! There it is, you might even be holding your breath a little bit, which is okay, that is the power of irradiation by actually squeezing and creating more tension you can leverage to actually move more weight.
Putting The Pieces Together To Get Stronger
So let’s say I have my weight here in the front rack position like I am going to press it, what you’re going to do right before you lift is you’re going to create this pulse of tension.
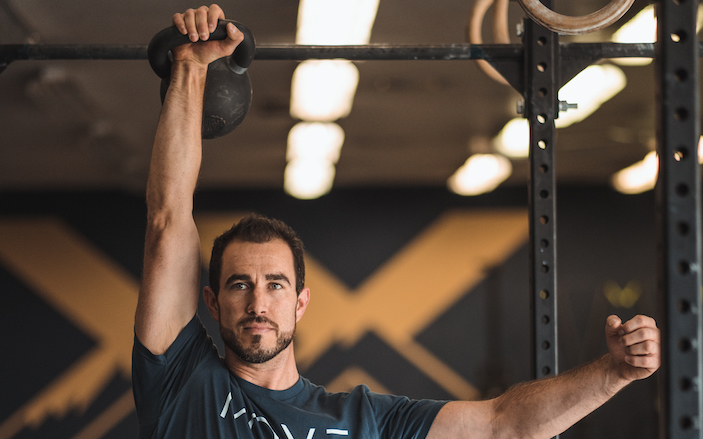
So the hand that’s holding the weight, kettlebell dumbbell, whatever it is, the opposite hand is going to be off to the side a little bit, but you’re going to squeeze both. And in doing so you should feel tension generated in not only your shoulders but hopefully your abs a little bit in your back. And then you should feel hopefully your butt squeeze a little bit.
So this is going to create a solid platform that your shoulder can then push off of many times. You not getting the full expression of our strength, because as we’re pushing, we’re wobbling platform.
You are creating more tension to move the weight. So let’s just pump it up a little bit so that you can move more weight, expand upon the strength that you’re already presenting with and then hopefully help you get a little bit stronger along the way.
Keep up the great work and Live LOUD!
Share below with a friend or loved one!
Movement mapping To Improve Your Range of Motion and Pain
Movement mapping To Improve Your Range of Motion and Pain
Hey, if you’re anything like me, you find that sometimes it’s tough to know which exercises are best to do, even as someone in my industry and in my profession, I’m always trying to find what the best exercise is based on how I feel. Now, most people struggle to understand this because they don’t know where to start. So I want to help you with that today.
My name is Dr. Antonio Gurule. I’m a chiropractor here in Lafayette, Colorado, with Live Loud Chiropractic and Coaching.
Today, what we’re going to be talking about is called movement mapping. Before you even do an exercise or a stretch, you need to know if it is actually a good fit for you.
Especially when we’re talking about mobilizations, how do you know where you need to mobilize other than just where you feel tight, right.
We need to be able to move every joint in our body every single day, and movement mapping is a way for you to audit your joint range of motion and abilities. And if you don’t, it starts to get really stiff, just like a rusty hinge on a door. And then it makes it more challenging to move at all.
PLAY VIDEO ⬇︎
All of a sudden you see a series of events happen where if my joints don’t move, well, then my muscles get really tight. And then if my muscles are tight, it’s hard to move my joints. And then we just see how this sticky material just starts building up on top of each other.
Realistically, anything movement you do is going to be good. But could we be a little bit more direct with what we’re doing?
How To Audit and Assess Your Range of Motion
Movement mapping is a global head-to-toe audit of what things feel like now.
Certain body parts such as the wrist and shoulder are straightforward and easy but your spine and your neck are two of the areas that are really forgotten and overlooked.
When movement mapping the neck be sure to sit down and do it in case you get a little dizzy or lightheaded.
The neck, if you consider all of the ranges of motion that should go through, we have flexion, we have an extension, we have side to side lateral flexion, and then we have rotation. Now there are baseline ranges of motion that we would ideally like to see, but what we forget is that our head doesn’t move like a robot. We couple those movements together so that we can do dynamic movements like checking a blind spot, or seeing something that’s flying over your head.
So movement mapping for your neck is taking into consideration all those planes of motion and trying to determine where you feel stuck. So for instance, I might look up and then add rotation. Right, I might look up and then go side to side. Or I might go side to side, and then add rotation.
I’m putting each one of these joints into a different position so that I can challenge it and make sure it’s moving. Even if one little corner of the joint is not moving, well, that’s going to bleed over and start to make the whole joint tight.
And this happens to so many of us because we live life right here in front of us, we often don’t look up, we look over to the side of a check-in a blind spot maybe. And while we’re driving. We’re looking down a lot. But we’re very rarely going side to side.
What I want to encourage you to do is just start mapping what areas are actually tight. And when you feel that tension, I want you to think of it like a rusty door hinge. instead of forcing it to stretch and move. I just want you to move in it back and forth. Just move it, move it, move it. Fortunately for us, we have our own WD-40, which is called synovial fluid it’s built into our joint, and the more we move it the more vascularization or blood flow we’ll have and then we’ll replenish that and then we’ll make that joint softer and more mobile
Don’t force it. You just brush up against the end of the range of motion and you move and then you come off and you go somewhere else and you move. This just done daily will make profound effects and how you feel, how well your joints move, and how and how loose your muscles can be. And it’s going to be very rejuvenating and revitalizing to the energy that it also brings you. So, if you haven’t done movement mapping, I strongly encourage you to do movement mapping, get a cup of coffee, get a cup of tea, do it in the morning, do it in the afternoon, do it wherever you see fit for your body, and I hope that can continue helping you live the adventurous life you were made for Once again, my name is Dr. Antonio.
Keep up the great work and Live LOUD!
Share below with a friend or loved one!
